Wednesday, March 28, 2012

Kitchen Herbs

Meryl Streep is my all-time favorite actress. Her class and intelligence can turn a middling film like "The Iron Lady" into compelling drama. Even with her charisma and earthy chemistry with Alec Baldwin, however, I'd have found "It's Complicated" a somewhat forgettable movie, except for one aspect: Garden Porn. Every scene in that kitchen garden sent waves of lust and envy washing over me. I read an article revealing the secrets behind the perfection, and while the produce was real, it was grown in greenhouses and only perfect plants made it into the garden (and even that wasn't enough--those gorgeous tomatoes were wired to the vines). Just like fake breasts don't seem to deter men's fantasies, the artificial perfection of those cabbage rows didn't cool my flames one bit.

I don't even have time for a PG-rated garden of my own right now. Fortunately, I live where it's easy to find lots of fresh produce at farmer's markets and stands. With real estate in a slump, investors are holding on to open land and farming is a good way to catch some extra tax breaks while doing so. I make strawberry jam from berries grown and sold a mile from here on a couple of acres tucked in between housing developments.

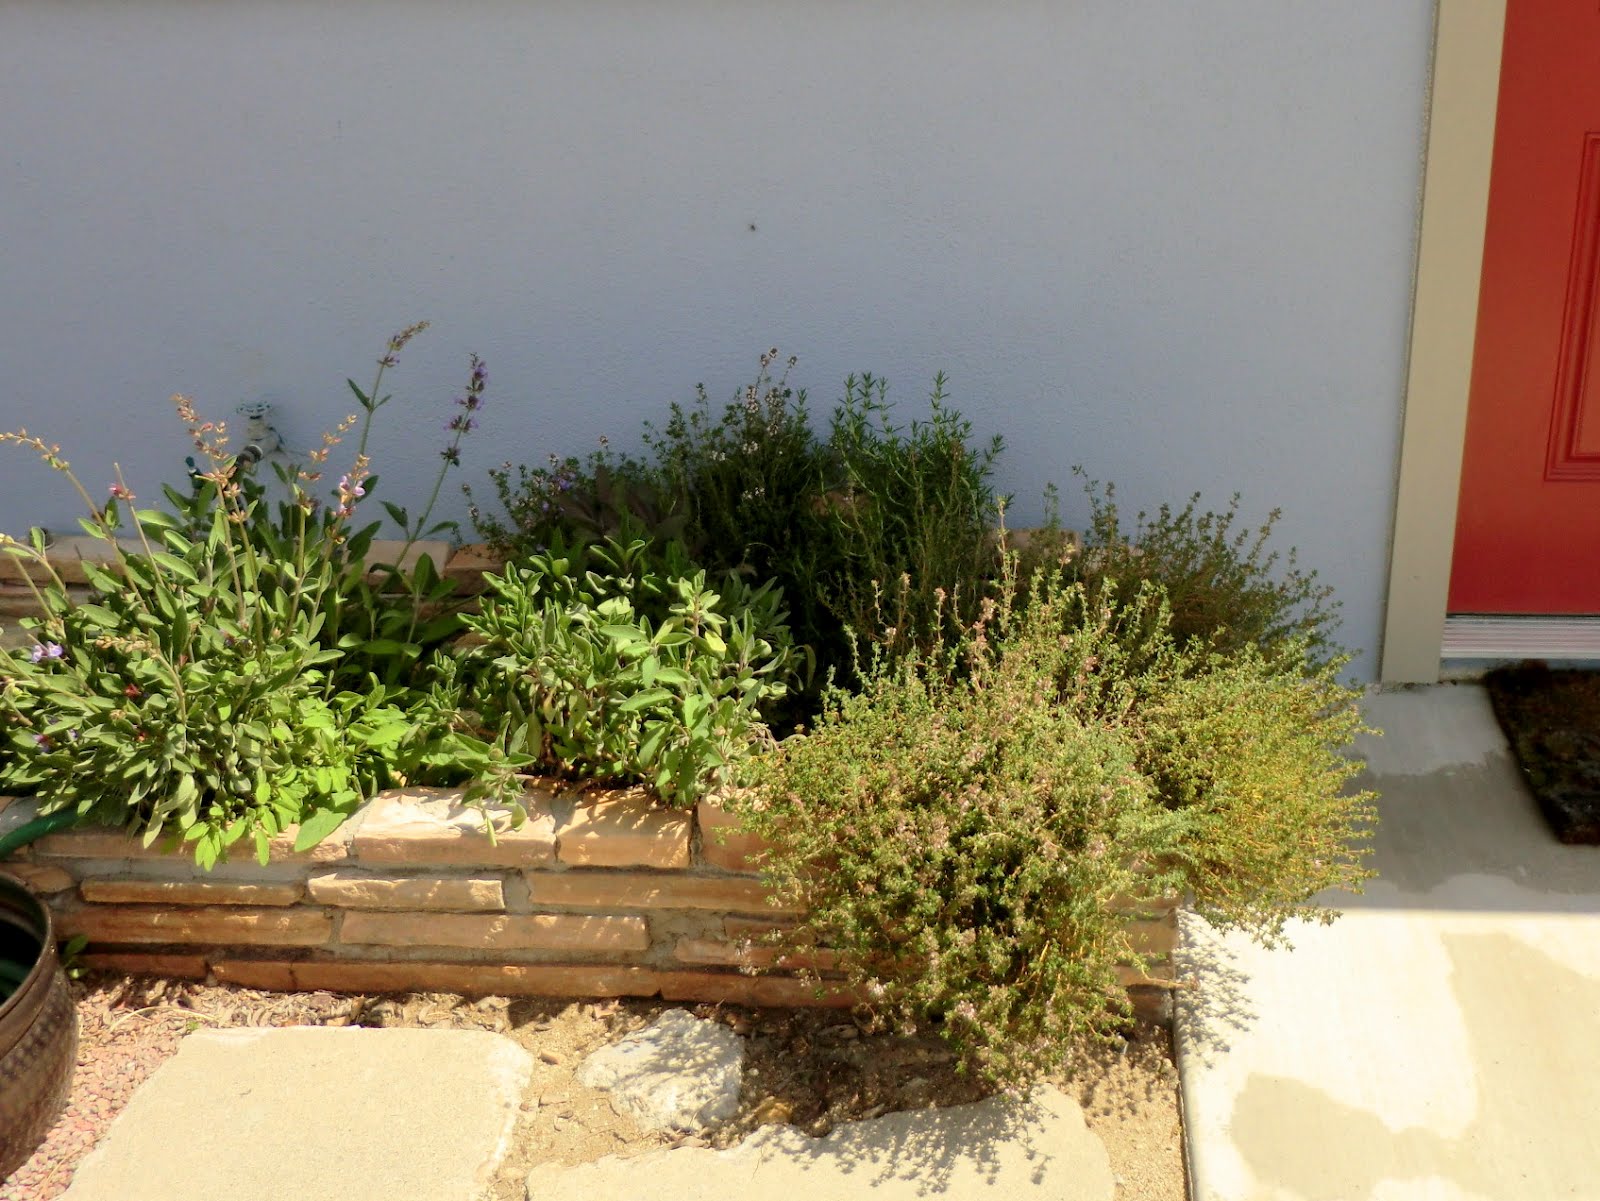
The one thing that truly needs to come "fresh off the vine" is fresh herbs. Because they don't keep well they're expensive at the market, so growing your own isn't just a culinary advantage, it makes economic sense as well. Fortunately, this takes no extra time or effort on your part. I've devoted a corner of a planter right next to my front door to rosemary and several varieties of thyme and sage, and oregano grows among the flagstones next to the stoop. These herbs need so little attention--non-culinary versions of them all show up throughout my low-water landscaping (and even those are edible, just a little sturdier). The hose is right next to the kitchen herbs so it's easy to spritz them regularly but if I get busy and miss even a week or two they hang right in there.

Most importantly, when I'm cooking all I have to do is pop out the door with a pair of scissors and snip all the freshness required to make a dish memorable.

Monday, March 26, 2012

What's Cooking?


I found this Fairytale Pumpkin squash at the vegetable stand today. You can see how it got its name, from that shape found in so many illustrations of Cinderella. I sliced it up and discovered a rich deep orange flesh inside--this photo just can't do the color justice.


Now the chunks are roasting at 375 in the oven. I really have no idea what I'm going to do with them so we'll just have to see! It's fun to try something out.


More later, as this plays out. Anyone with ideas, please post!

Next day: Well, so far no fairytale ending for the Fairytale Pumpkin. I followed roasting instructions I found on the internet and ended up with tough chunks of pumpkin. I should have known better. I will probably dice some of it up and throw into the stew I'm making this afternoon.

The name Fairytale Pumpkin is too alluring to give up on, so I'm picking up another one and will try again using a roasting pan covered with foil to retain moisture.

It's fun to write about cooking successes, but the fact is that a lot of cooking is try, try again.

A couple of days later: Well, it wasn't a loss after all. I was in a hurry the other day so made a quick lunch by heating up a big chunk of the cooked pumpkin, finishing off with a dab of butter and salt. The squash flavor had intensified by sitting in the fridge, and the flesh had rehydrated a bit. It was tasty and took me through the whole afternoon. I know something that deep orange and fiber-rich has to be super-healthy as well. I ate pumpkin for lunch again today. Even though it had been sitting in the fridge for 5 days, it was just as tasty. I can see this as an easy way to make lunches for school.

Tuesday, March 20, 2012

Sometimes it's worth it to think outside the box

Today is my friend Tom's birthday. So I made him a cake. As my faithful readers know, I'm a big fan of mixes--why do all that work when someone else has already done it for you? Sometimes, though, it's really satisfying to do the work yourself. And rewarding. Voila Tom's cake.

I've made a lot of yummy cakes from mixes. Duncan Hines Lemon Supreme for example, finished with a can of Betty Crocker cream cheese frosting. Pretty damn good. And I've messed around with this cake recipe and that, because the write-up in the LA Times food section makes them sound so good. Last winter my friend Maryanne and I tag-teamed on a couple of sponge-cake recipes, trying to figure out which one worked best. But really, again, why do the work when someone else has done it for you? Someone like the great food scientist Shirley Corriher.

I've been hooked on Shirley since I first heard her interviewed on NPR's Fresh Air. My mom bought me her cookbook/textbook Cookwise, which teaches not only how to cook, but why. It's a fantastic tome. Then, my fried Gail started experimenting with her quickbread recipe, and said she sure wished she knew more about adjusting proportions as she changed her ingredients around. Well, bless Shirley's heart, she had just put out another cookbook all about that very topic: Bakewise. There was Gail's Christmas present (and of course one for me too).

Because she explains not only how to do something, but why, Shirley Corriher's recipes turn out yummy and reliable. She admits she has a powerful sweet tooth, and cakes are obviously nearest and dearest to her heart. There is no cake mix on earth that can come close to her Satin-Glazed Midnight Black Chocolate Cake. As much as I love chocolate, however, I have to award the blue ribbon to her Magnificent Moist Golden Cake. I baked it yesterday, and went to bed with the sweet perfume of vanilla and cream still hovering in the air.


Nonstick cooking spray with flour
4 Tbl unsalted butter, cut in 1-Tbl pieces
1 ½ cups sugar
2 tsp pure vanilla extract
1/3 cup canola oil
3 large egg yolks
2 large eggs
1 ¾ cups spooned and leveled cake flour (NO SUBSTITUTE!)
1 ¾ tsp baking powder
½ tsp salt
1/3 cup buttermilk
½ cup heavy cream

1. Arrange a shelf in the lower third of the oven, place a baking stone on it, and preheat the oven to 350.

2. Spray a 9 x 2-inch round cake pan with nonstick cooking spray with flour and line with a parchment circle, then lightly spray the top of the parchment, too.

3. In a mix on medium speed, beat the butter to soften. Beat until it is light in color, about 3 minutes. Add the sugar and continue to beat (cream) until very light, scraping down the sides and across the bottom of the bowl at least once. While creaming, feel the bowl; if it does not feel cool, place in the freezer for 5 minutes, then continue creaming.

4. Beat in the vanilla. On medium speed, blend in the oil.

5. On the lowest speed, blend in the yolks, one at a time, mixing just to blend. Blend in the whole eggs, one at a time, mixing just to blend.

6. In a medium mixing bowl, beat the flour, baking powder, and salt for a full 30 seconds at medium speed with a hand mixer or with a fork or whisk by hand.

7. On the lowest speed, blend over half of the flour mixture into the batter. Continue on lowest speed and blend in half of the buttermilk. Continue adding the remainder of the flour until all is incorporated. Blend in the remaining buttermilk.

8. In a cold bowl with cold beaters, whip the cream until soft peaks form when the beater is lifted. Beat just a little beyond this soft-peak stage. Stir about one-quarter of the whipped cream into the batter to lighten. Then fold the rest of the whipped cream into the batter.

9. Pour the batter into the prepared pan. Drop the pan onto the counter from a height of about 4 inches to knock out bubbles. Place the cake in the oven on the stone and bake until the center springs back when touched, or a toothpick inserted in the center comes out clean but moist, about 40 minutes. Ideally, the cake should not pull away from the sides until it has just come out of the oven. the center temperature should be about 209 degrees if you check by inserting an instant-read thermometer.

10. Place the cake in the pan on a rack to cool for about 10 minutes, then shake the pan to loosen the cake all around. spray a cooling rack with nonstick cooking spray and invert the cake onto the rack to finish cooling. Peel off the parchment. Cool completely before slicing into layers, storing, or icing.

Today, I sliced the cake into two layers and filled the middle with some homemade strawberry jam thinned with a little Grand Marnier and a nice helping of mocha frosting, made with Shirley's Basic Confectioners' Sugar Buttercream recipe. The outside is a thick layer of more of that frosting with walnuts pressed into the sides. Tom's about as Guy's Guy as a guy can get, so I didn't want to make it too frou-frou, but at the same time it's so much fun to play around with frosting tips, so I got a little flourish-y with the dark purple embellishments. I don't think he'll mind!

If you want the frosting recipe, or more details on the whys and wherefores of the cake recipe, or just want to spend some time learning really cool stuff about the science of baking, or just get your hands on a whole passel o' kick-ass recipes, you must check out Shirley's book (actually, check out both of them!); you can also catch her quite often on Alton Brown's Good Eats cooking show on the Food Network. Shirley teaches a lesson with each recipe in her book, and although I didn't take the time to include them here, she gives each amount in ounces and grams, which I often use to make sure I have the proportions perfect. They came in especially handy this time, since I used some of Gail's duck eggs to make the cake. They're larger than chicken eggs, and knowing exactly how much the yolks and whole eggs should weigh made it possible to use just the right amount. Bakers swear by duck eggs--the yolks are heavy and rich and assertive. All I know is that the cake turned out perfect.
Saturday, March 17, 2012

Celebrate the Butternut

There's a great new restaurant in town, Wild Rocket. I've had some really yummy bites there, and highly recommend it (corner of Eureka and Pearl--you gotta try it).

Imagine my disappointment yesterday then, upon ordering a bowl of butternut squash soup and finding it completely unremarkable. The goat cheese-stuffed dates, pear arugula salad, and berry crumble were simply delightful. How could someone who knew how to create such flavors be content with such a bland bowl of soup? The waitress said it's really meant as a base for lobster (which I don't eat) but I still ask myself, why not celebrate the butternut???

I had the urge to slip him my recipe. I can't take credit for it (the LA Times can) but after having made it a zillion times I can vouch for its utter deliciousness. When my friend Lari had jaw surgery and was limited to what she could sip through a straw, a pot of this manna helped her survive.

This recipe taught me the magic of jalapeno. My first try, I forgot to buy it; the soup was still good enough to make again, and the second time it had the jalapeno, and wow, although I couldn't taste it, suddenly all the other flavors just danced in my mouth. Since then I've been adding it to all sorts of stews, pot roast, and more.

************

¼ cup butter
2 leeks, cleaned and chopped
3 stalks celery, coarsely chopped
2 large carrots, peeled, chopped
1 1” piece fresh ginger, peeled & grated
1 fresh jalapeno, seeded & chopped
1 tsp dried thyme
Sea salt to taste
2 lbs butternut squash, cubed
4 cups stock or water
½ cup cream (I use half and half, the original recipe calls for heavy cream)
Freshly ground white pepper


Melt butter over medium heat. Add leeks, celery, carrots, ginger, jalapeno, thyme, and salt. Cook, stirring sometimes, until veggies are wilted, about 10-15 mins.

Stir in squash and stock, bring to a boil, reduce heat to med/low, cover and simmer 20-30 minutes until vegetables are falling-apart soft.

Puree with immersion blender (or in a blender or food processor).

Stir in cream.

Season with salt and pepper to taste.

Serve at once; or reheat gently if needed.

************

I think maybe I was disappointed in Wild Rocket's version because I know what butternut can be. If the chef got a hold of this recipe the soup, while still working beautifully as a base for lobster, would be a star of the menu, all by itself.

Thursday, February 23, 2012

It's rich. It's easy. It's healthy. It's intensely good. You just didn't know until now that something this yummy existed

I heard John Mariani, an expert on Italian-American food, interviewed by Terry Gross on NPR a while back. He was chock-full of all sorts of interesting information on the history of Italian cuisine in America. I learned why, until recently, our notion of Italian food involves a lot of pizza and heavy pasta and meatballs (most Italian immigrants were poor folks from Naples).

In the middle of all this great food history, Mariani suddenly dropped the simplest recipe. He said this was the marinara sauce he grew up on, still his favorite. I didn't even have to go digging on the internet to make sure I had all the ingredients and proportions right. Here's why:

Chop 3-4 cloves of garlic. Brown in a heavy saute pan for 3-4 minutes. Remove garlic bits, add 1 can peeled Italian tomatoes. Cook on low 20-30 minutes, smashing tomatoes as they cook. Add salt/pepper to taste, and basil.

That's it. It tastes so rich and the tomato flavor just sings. With all the sugar and other ingredients meant to pump up the flavor in every jar of pasta sauce on the grocery store shelves, mass-produced marinara just can't hold a candle to this simple concoction, which, by the way, is less expensive as well, even if you use the pricier San Marzano tomatoes he recommends. They are worth it, but the first time I made this sauce all I had on hand was Stater Bros store brand tomatoes, and it still knocked my socks off. I also made it with a can of Trader Joe's peeled tomatoes with basil, and it was intensely yummy.

Tonight I added a couple of ingredients, although I didn't want to mess too much with perfection. Instead of removing the browned garlic bits from the pan, I sauteed chopped onion and mushroom before adding the tomato and sprinkling in dried oregano, finishing again with basil. Sooo simple, why am I even blogging about it?

Because it's seductively, intensely good.

Monday, January 30, 2012

Easy as pie Berry Pie

So now that I have this pie crust thing down cold (and I really do. Exact same results every single time!) I've been playing with fillings. As you can see from the previous post, the apple thing is good to go. However, I also love berry pie, which is a lot more challenging. It's either too tart or too sweet. Too runny or too gelatinous. And so on. This weekend I set myself to work on the problem.

It seems to me that the biggest problem with berry pie is that it's too much of a good thing. All that flavor comes with a lot of tartness; all that juice requires too much thickener. A lot of fruit juices are mixed into a foundation of apple juice, which supports the main flavor without diluting it too much. So I chopped up a bunch of apples into blueberry-sized chunks, threw them into a saucepan with lemon juice, and started them cooking. I mixed together flour, cornstarch, white and brown sugar, a dash of salt, and spices--cinnamon and nutmeg--and stirred that into the cooking apples. It started to get too thick to cook the fruit properly, so I added some frozen berries to increase the liquid content. I didn't want to add them all since they'd cook down and lose their shape, and I wanted to preserve as much berry texture as possible. Once the apples were nicely soft, I removed them from the heat, let them cool just a bit, stirred in the rest of the frozen berries (1/2 bag blueberries and 1/2 bag mixed berries--blueberry/raspberry/strawberry/blackberry), and set the filling aside.

I rolled out the crust and assembled the pie, dotting the filling with butter before adding the top crust. Since the berries are so juicy I crimped the crust as carefully as possible to keep juice from leaking out the edges (I should have still put a pan or sheet of foil beneath the pie in the oven since it found a crack to flow through). After slashing a starburst pattern in the top I pulled out my cookie cutters and with the leftover bits of crust dough I made a dragonfly and applied it with a little milk to the center of the starburst. Since I still had a lot of dough I cut out some strawberries, dusted them with milk and sugar and scattered them around the top. I decided they looked dorky but left them there.

I baked the pie until golden. It took a loooong time to cool. Finally we got hungry and went ahead and sliced into it--yum yum yum. It was still a bit runny but the strawberry decorations helped soak up the juice.

The next morning, the pie was oh so perfect. The filling had properly set, and offered everything you'd want in a berry pie--lots of rich flavor, not too sweet or tart. Nice texture, stable and silky but not at all gooey. The berries held up well enough to be recognizable, and the apple chunks had soaked up so much purple juice they blended right in. I'd never had berry pie quite that satisfying.

I'd love to give an exact recipe here, but I can't swear to all the proportions. I'll have to repeat the recipe a couple of times to give reliable amounts.

What I do know is the secret to great berry pie. It's apples.

Wednesday, January 18, 2012

Now, it really is easy as pie

When I'm out working in my yard I hook my iPod to some little computer speakers and catch up on my Fresh Air podcasts. So there I am, mucking around in the dirt laying cement slab chunks to create a little patio transition from the cement stoop, when Terry Gross starts interviewing a couple of chefs from America's Test Kitchen/Cook's Illustrated. It doesn't get any better than this--an afternoon of dirt and food.

Among the various gems of culinary information these two chefs imparted, came the Answer to My Greatest Baking Deficiency: pie. Actually, pie crust. That phrase "easy as pie" has always annoyed me a bit because in Carmen World pie ain't all that easy. I'm fairly good with the filling part (sometimes my fruit pies are a little watery) but crust is nothing but a chore and most of the time either it isn't tender and flaky enough, or doesn't turn out very visually appealing, which in my mind defeats an important purpose of food--to delight the eye as well as the palate.

Apparently I'm not the only person not up to that challenge. The chefs said pie crust is notoriously inconsistent, so they set out to find the secret to a beautiful flaky crust that could be consistently produced each time. And they claimed success. So what was the big secret?

Vodka, my friend.

And while a quick hit of icy cold Ketel 1 (along with a bite of bakery bread slathered in sweet butter--the Russians know how to do it right) can improve any baking experience, it's what goes into the pastry dough, not down your throat, that makes it so so great.

Vodka, really?

The problem with pastry dough is that as the water mixes into the flour it develops gluten. Undermix your dough, and it's inconsistent, too dry here, too sticky there, impossible to roll out properly. Overmix, and you have tough (glutenous) crust. Alcohol does not develop the gluten, and vodka adds no flavor so it's perfect for the job. The basic rule is replace half the water with vodka. However, I wanted what these culinary geniuses (just ask any Cook's Illustrated subscriber) thought was the perfect recipe, so when I was all done with my little yard project I went online and dug up their recipe (Cook's Illustrated doesn't hand most stuff out for free, but I'm good with the Google).

I made an apple-blueberry pie. Took it to friends' the next day and tucked it in among the others on the dessert table. Pretty soon the accolades started coming--and here's the thing: my filling was only good, definitely not great. I'd been so focused on the crust that the apples were too chunky and the whole thing a bit soupy, but the crust was so good it just didn't matter as much. I was amazed at what a difference a great crust can make! I had a slice of another pie, and made sure to dissect the filling because it was superb--that filling, my crust: truly the perfect pie.

Made another pie. Again, perfect crust (and got the filling right). Made another one. Exact same results.

I am now the Pie Queen.

Unlike Cook's Illustrated, I won't make you subscribe or resort to Google subterfuge for the recipe. Here it is, in all its turn-out-the-same-every-dang-time glory:


2 1/2 cups (12 1/2 ounces) unbleached all-purpose flour
1 teaspoon table salt
2 tablespoons sugar
12 tablespoons (1 1/2 sticks) cold unsalted butter, cut into 1/4-inch slices
1/2 cup cold vegetable shortening, cut into 4 pieces
1/4 cup cold vodka
1/4 cup cold water


Process 1 1/2 cups flour, salt, and sugar in food processor until combined, about 2 one-second pulses. Add butter and shortening and process until homogeneous dough just starts to collect in uneven clumps, about 15 seconds (dough will resemble cottage cheese curds and there should be no uncoated flour). Scrape bowl with rubber spatula and redistribute dough evenly around processor blade. Add remaining cup flour and pulse until mixture is evenly distributed around bowl and mass of dough has been broken up, 4 to 6 quick pulses. Empty mixture into medium bowl.

Sprinkle vodka and water over mixture. With rubber spatula, use folding motion to mix, pressing down on dough until dough is slightly tacky and sticks together [I dumped the dough back into the food processor and pulsed a few times to get it really consistent. I actually had tried just sprinkling the water/vodka through the feeder tube while pulsing, but the liquid didn't distribute as well as I wanted. It isn't much hassle to dump the mixture into a bowl, then back into the processor, and the dough comes out perfect]. Divide dough into two even balls and flatten each into 4-inch disk. Wrap each in plastic wrap and refrigerate at least 45 minutes or up to 2 days.


So that's the Great Vodka Crust Recipe. Here's how I turned it into Great Apple Blueberry Pie:

While pie crust dough is chilling in the fridge, mix together and set aside:

about 3/4 cup sugar (I like to mix 1/2 cup white, 1/4 cup brown together)
about 2 Tbl flour
a pinch of salt
about 3/4 tsp cinnamon
1/4 tsp nutmeg
1/4 tsp allspice

Notice that the amounts are all approximate. Go with your preference and the tartness of the apples.

Core and peel 5 apples (I prefer Macintosh). Slice each apple into quarters, then slice the quarters crosswise into pieces about 1/6" thick (picky, huh? but 1/4" is too thick, 1/8" too thin and will make apple mush. It doesn't matter if some pieces are a little thinner or thicker--what you're looking for is that 1/6" average, which will deliver the perfect filling texture and consistency). Toss with a squeeze or two of fresh lemon (preferably a Meyer lemon), a few dashes of Tabasco, and most of the sugar mixture--reserve a couple of tablespoons to toss separately into a cup of fresh blueberries, so they don't crush and mush into the apples.

Roll out one of the dough disks (use lots of flour) and place into a nice deep pie dish. Pour in the apple filling and press down a bit, then sprinkle the blueberries on top.

Roll out the other disk of dough (see how easy it was to make a perfect round?) and place over the top. Fold and crimp to your heart's delight, have fun arranging little pastry cutouts around the rim or on top (I made a pie in an oval baking dish and lined the rim with pastry apple leaves. It was so pretty!) and cut a few slits in the crust. Brush the top with a little milk or cream and sprinkle sugar on it (I use either raw sugar for texture, or superfine baker's sugar for a glistening surface).

Bake according to your oven's capabilities. I have a convection oven, so I start it at 415, then turn down to about 350. It takes probably about 45 minutes, but I'm not sure because I haven't kept track. I just keep an eye on it. When the crust is nicely golden it is done and ready to delight your eyes, your mouth, and your tummy.

What's Russian for Bon Appetit?