Oat Bran Muffins
Every time I stay at my mom's she sends me home with a bag of these muffins. They're good Mom Food--tasty, nutritious, and unfussy. They're light but stick to your ribs, with no flour (naturally gluten-free, and--for those like me avoiding simple carbs--low on the glycemic index) so I started making them myself for the in-between-visits times.
Mom pulled the recipe off the back of the Quaker Oats oat bran box. Their bran is more finely milled than most, and when I tried making it with another brand it sat heavy in the muffin tin. So I put my bran in my food processor and milled it finer, and the recipe worked again. Then, I tried simply letting the batter sit in the mixing bowl a bit before portioning into muffin pans, and that worked just as well--the liquid had a little more time to soak into the bran, so it didn't matter whether it was as finely milled.
Oven 365.
2 cups oat bran
2 tsps baking powder
3/4 tsp salt
2 eggs, lightly beaten
1 cup mashed banana (when a banana gets a little brown I toss it in the freezer. It thaws quickly into the perfect consistency for cooking)
1/2 cup orange juice
2 Tbls oil
1/4 cup honey (I smear the oil residue left in the measuring spoon into the 1/4 cup measure, then pour the honey in--it'll slide right out into the batter)
Add-ins: raisins, mini chocolate chips, chopped nuts, dried cranberries (about 1/2 cup altogether, although I tend to overadd and never regret it)
Mix the bran, baking powder and salt. Add the eggs, banana, orange juice, honey, and oil. Mix until incorporated, but don't overdo it. Even though you aren't worrying about developing gluten, you don't want to beat out the air bubbles you just mixed in with your liquids. Toss in whatever combo of add-ins and stir just enough to distribute.
Spoon into muffin tins or silicone cups. I use a silicone muffin pan that's a little wider and shallower than my metal tin and fill them pretty much to the top. These muffins have a nice light fine-crumb texture, but they aren't going to raise up fluffy with that traditional muffin top since there isn't any refined flour in them.
Bake at for about 15 minutes or so (it really depends on what kind of pan, size, etc.). Keep an eye on them, and when they're golden, test with a toothpick or cake tester. Remove from oven and turn out onto a cooling rack.
Store in a ziplock bag in the fridge. Heat your muffin in the microwave for about 20 seconds for a fresh tasty breakfast or snack anytime during the day!
Showing posts with label gluten-free. Show all posts
Sunday, January 28, 2018
Sunday, December 24, 2017
Almond Cherry Cookies
I came across this recipe in the LA Times, knew I had to try it, but wanted to wait until Kaitlyn came for Christmas because the recipe is naturally gluten-free. It was worth my patience. The LA Times has been a source of many of my favorite recipes over the years--my butternut squash soup is the best I've ever tasted anywhere, anytime, and it's straight from the Food Section, as is the turkey chili also found in this blog.
This cookie recipe is from a bakery in Berkeley, requested by a reader in the Culinary SOS column because it is gluten free. I've never had a substitute-ingredients gluten-free baked good that was quite as satisfying as the original, but half my cookie recipes simply don't include flour. Who needs it when almonds, sugar, and egg whites make such a perfect bite?
The only change I've made in the instructions is the cookie size. The bakery's instruction was to form the balls from 2 tablespoons of dough, supposedly 1 ounce. I used my 2-Tbl meatball scoop and formed a few cookies, and realized they'd be 'way too big. So I weighed 2 Tbl of dough, and it was 2 ounces, not 1. I also changed how I formed the dough around the cherry. I like things easy.
Almond Cherry Cookies
About 30 dried cherries, preferably sour
1 pound blanched almonds
2 cups sugar
3 egg whites
1/2 tsp almond extract
pinch salt
Place cherries in a pyrex bowl and pour boiling water over to soak. Grind the almonds and sugar together in a food processor until a fine, flour-like texture. Add egg whites and almond extract and pulse until the dough comes together and balls up. Wrap in plastic and chill. Drain the cherries and lay out on paper towels to dry a bit.
Heat oven to 325 degrees. Line cookie sheets with silpats or parchment. Form 1-ounce cookie balls using a 1-tbl scoop or spoon. Flatten the center of the ball with your thumbs, place a cherry in the dent, and wrap the dough up around the cherry to make a ball again. Place cookies about 1 1/2 inches from one another on the sheet, flattening a little.
Bake for about 20 minutes until lightly golden at the edges, rotating cookie sheet halfway through for even baking. Cool completely on a wire rack before storing in a sealed container.
We all loved the cookies, assuring ourselves that this much almond must be healthy (as I assure you it is). Tim was conducting a series of gin and whiskey tastings along with the cookies, and I highly recommend St. George Botanivore gin as the perfect accompaniment. Kaitlyn and I wondered why the recipe didn't just call for almond meal, but then decided that the chemical reaction from grinding the almonds with the sugar was likely an essential component of flavor and/or texture. And, it makes the house smell really good.
Next time I make this recipe I'm planning to try variations--dried dates, cranberries, or apricots soaked in a little Cointreau could be delicious. Basically anything that pairs well with almonds. The one guarantee is that this recipe is going into regular rotation, because it is so easy, and heaven in your mouth.
Sunday, September 17, 2017
Chicken Noodle Soup

That's what originally inspired this soup, but honestly it's good for any occasion during those 6 months of the year when the temps dip below 70 degrees here in Southern California.
Most or all of these ingredients are already in your pantry. I keep chiles on hand because they enhance flavor of soup, marinara, and anything else you make. Pasilla delivers a milder heat than jalapeno; I tend to dice jalapeno fine and keep pasilla pieces larger or use a greater amount unless I'm really catering to Tim's tastes--which run gentler than my own. For this recipe the red bell pepper's sweetness balances the pasilla's pop.
I like rice noodles because they cook so easily (you don't even have to boil them--time spent in warm water does the trick) and keep their texture over time instead of getting mushy like traditional noodles. Also, because they're made of rice they provide needed simple, easily digestible carbs.
1 chicken breast
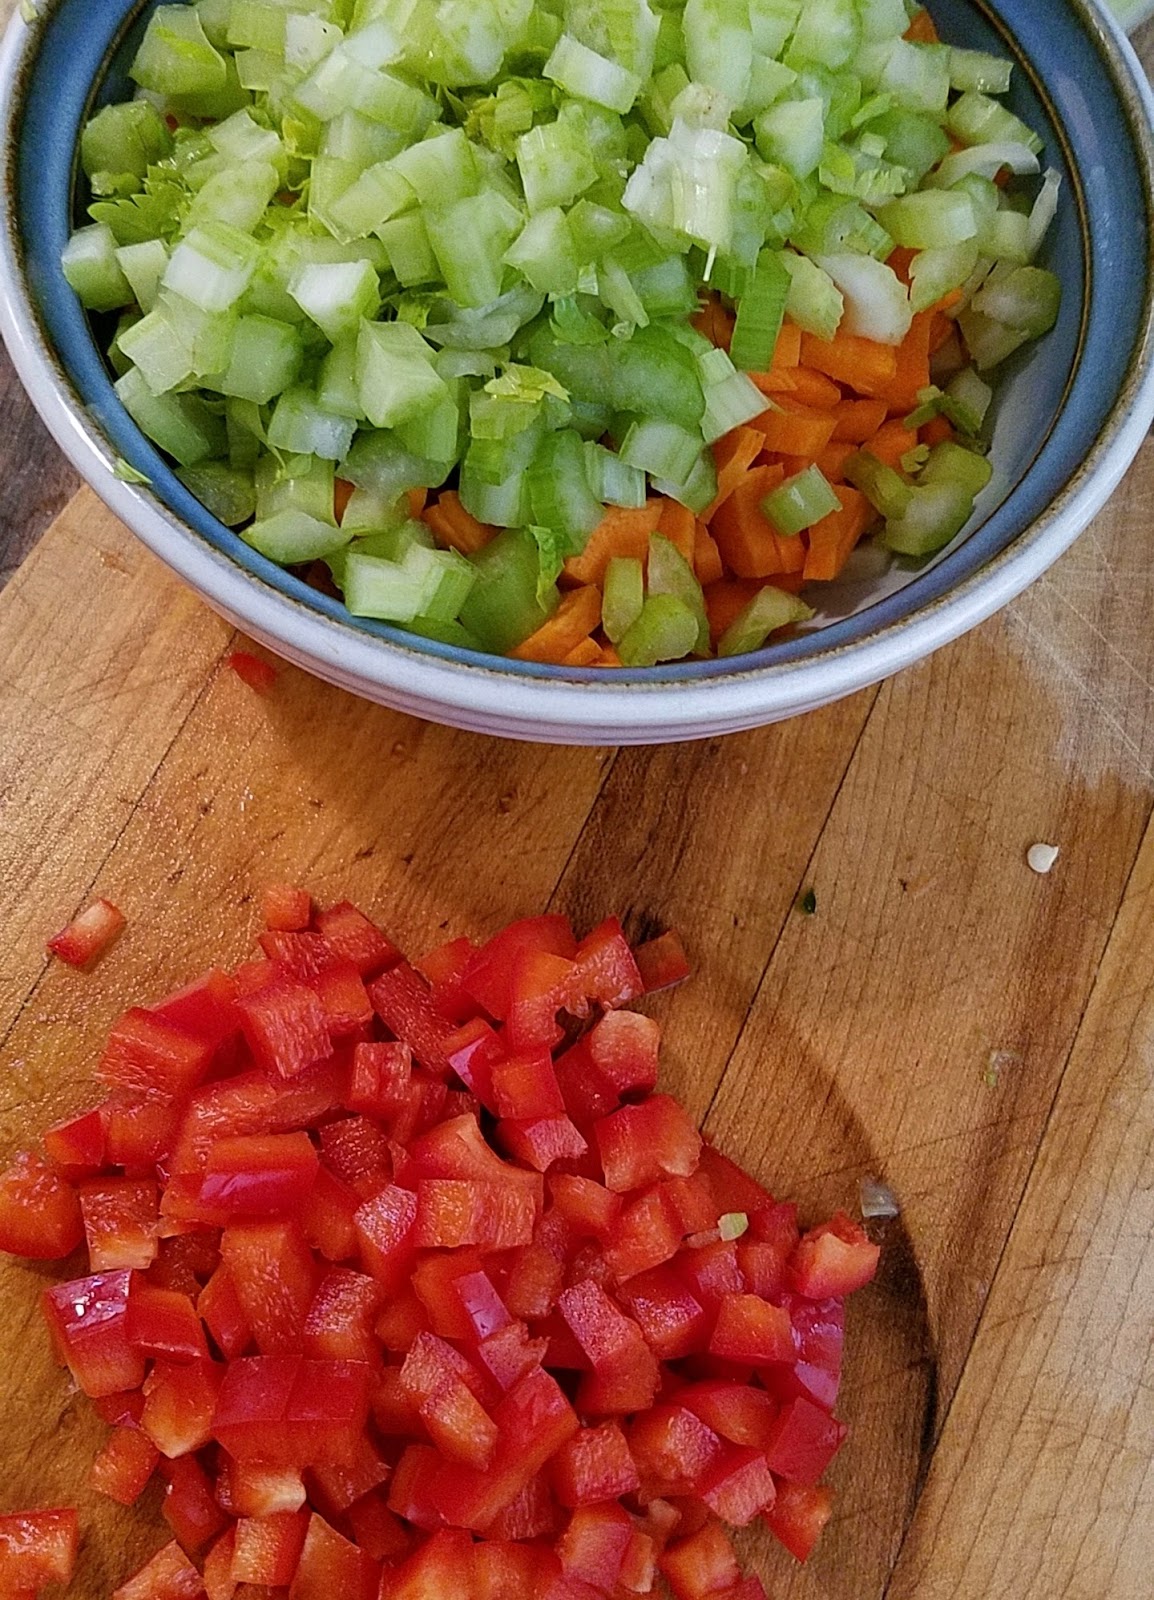
3 stalks celery
2 carrots
1/3 onion
1/3 red bell pepper
1/3 pasilla chile
Thai rice noodles
1 box unsalted chicken stock
Salt
Herbes de Provence
Put your pot over a low flame to preheat. Dice the vegetables. An inner leafy stalk of celery makes a nice flavor enhancement.

Turn up the heat and saute the veggies in oil for a couple of minutes.
Dice the chicken breast and add to pot along with the chicken stock and a teaspoon of herbes de Provence. VEGETARIANS: pour two to three beaten eggs into the liquid instead of the diced chicken.
Yes, I use commerically-made stock. Who has time to make their own? This unsalted version is simple and flavorful.
Simmer for 10 minutes over low flame. Break a fat handful of rice noodles into thirds, add to the pot, and continue simmering over very low flame for about 10 minutes more. Taste for salt (it'll need 1/2 teaspoon or so), and add water if necessary.
That's pretty much it. Ladle up a bowl for your boo, and while you're at it, one for you too.
Sunday, November 6, 2016
Gluten-free quichelettes
I like having gluten-free options for family and friends, but a lot of recipes try too hard to recreate all aspects of a non-GF dish. I like things that are more naturally-occurring GF--something everyone at the table would choose to eat, not just those who have no other choice.
When I saw a box of gluten-free stuffing mix at Trader Joe's, it just struck me that those crunchy croutons would make a great base for quichelettes, and happily I turned out to be right. The croutons themselves were so tasty I kept snacking on them as I was preparing the dish, which was itself inspired by a recipe I'd seen on Pinterest, sponsored by Bisquick.
The final product is a little handful of quiche with a creamy eggy filling soaking down the vegetables into the crouton base layer that stays just the right amount of crunchy.
So, here's the process:
Sautee whatever vegetables you want to use. In my fridge I found onion, roasted pasilla chile, and purple kale. Next time I'll probably opt for green onion and red bell pepper, and definitely chop everything into more consistently-sized pieces as this first attempt is a bit ragged with the pieces of kale and cheese sticking here and there.
Spray muffin tins and put in a base layer of croutons.
Then spoon in a small amount of the sauteed vegetables. Top with shredded cheese--I used a combo of cheddar and a four-Italian-cheese medley.
For 14 quichelettes I whipped 4 eggs with one cup heavy cream until frothy, added salt, pepper, and thyme, then poured a little into each muffin cup, distributing as evenly as I could.
After about 10-12 minutes in a 425 oven, the tops were puffy and nothing jiggled, so out they came. Next time I'll include a little less vegetable filling, keeping the same amount of cheese and egg. I might crush the croutons a little so they make a little more consistent base layer. However, now I know I have an excellent base recipe that is super-easy to make and can handle all sorts of variations. This could be made with regular croutons of course, but the flavor and extra crunchiness of the gluten-free ones are definitely my first choice for this recipe.
Friday, January 10, 2014
Veggie Burger Love!
If you've been following my posts you know I've been having fun with my Veggie Burgers Every Which Way cookbook, along the way learning a lot about the foundation ingredients of non-soy veggie burgers. Tonight it was time to strike out on my own. What I like about these is that they make a really well-rounded meal--complete protein, lots of other nutrients, and just enough fat to be balanced and truly healthy, while still tasting indulgent. I used everything I've learned about boosting flavors with mushroom, walnuts, etc. to make a full-flavored burger. It's pretty simple and yummy yummy.
The result? Tastiest veggie burger I've ever made. For my gluten-free friends,this version is just your thang!
Without much further ado, here it is. Haven't had time to name it yet. Any suggestions?
Makes 8 patties
1/4 cup quinoa
1 15-oz can black beans (no-salt variety)
1 shallot
5 oz (1/2 bag) crimini mushrooms
2 carrots
Fat handful fresh greens, such as spinach, kale, etc. (I used Trader Joe's mixed baby power greens--spinach/chard/kale)
Fingerful of fresh mint (dried herbs would be fine)
1 tsp chopped fresh sage
1/2 tsp chopped fresh oregano
3 eggs, lightly beaten
2 Tbl brown mustard
1/3 cup grated parmesan cheese (unnecessary, but a nice indulgence)
1-2 Tbl coconut flour (you can use 1/2 - 1 cup bread crumbs, depending on your needs)
1/2 tsp baking powder
Hearty splash lemon juice
1 tsp salt (or more to taste)
1/4 to 1/2 tsp freshly ground pepper
Healthy pinch red pepper flakes (or more to taste)
1/2 cup chopped walnuts
Place the quinoa in a fine sieve and rinse well. Cook with 1/2 cup water in a small saucepan and set aside. Drain and rinse the black beans, set aside.
Chop the mushrooms into pretty small pieces. Peel and roughly chop the carrots, then place in a food processor along with the greens, shallot, and fresh herbs. Process in short bursts until everything is small pieces but not so fine as to be mush. Saute the mushrooms in a skillet (preferably cast iron, of course!). This gives them a good meaty texture and flavor.
In a mixing bowl, mash the beans with a fork or potato masher. Mix all ingredients together, adjusting coconut flour (or bread crumbs) according to mixture wetness. Let sit for a while.
Heat up a griddle and oil well (no need to skimp--don't bother with Pam or something like that).
Scoop about 1/3 cup mixture, press firmly together in a ball, and flatten to about 1/2" thick. Place on griddle and let cook until nicely firm and toasty brown on bottom. This will take a little while, because you want the patty to cook through the middle while it's developing that toasty outer layer. Top surface should be somewhat dry before you flip. Cook nice 'n toasty on the other side.
Mom and I ate these with avocado, greens, and sliced tomato. She thought a nice yogurt sauce (such as raita) would really go well, and I'm definitely trying that next time!
Extra patties? You can cool, wrap in wax paper and ziplock bag or tupperware, and refrigerate or freeze for later.
I didn't think about photos as I was cooking, so I will try to remember next time I make them, which will be soon.
I'd love feedback! Let me know what you think, and if you try out this recipe.
The result? Tastiest veggie burger I've ever made. For my gluten-free friends,this version is just your thang!
Without much further ado, here it is. Haven't had time to name it yet. Any suggestions?
Makes 8 patties
1/4 cup quinoa
1 15-oz can black beans (no-salt variety)
1 shallot
5 oz (1/2 bag) crimini mushrooms
2 carrots
Fat handful fresh greens, such as spinach, kale, etc. (I used Trader Joe's mixed baby power greens--spinach/chard/kale)
Fingerful of fresh mint (dried herbs would be fine)
1 tsp chopped fresh sage
1/2 tsp chopped fresh oregano
3 eggs, lightly beaten
2 Tbl brown mustard
1/3 cup grated parmesan cheese (unnecessary, but a nice indulgence)
1-2 Tbl coconut flour (you can use 1/2 - 1 cup bread crumbs, depending on your needs)
1/2 tsp baking powder
Hearty splash lemon juice
1 tsp salt (or more to taste)
1/4 to 1/2 tsp freshly ground pepper
Healthy pinch red pepper flakes (or more to taste)
1/2 cup chopped walnuts
Place the quinoa in a fine sieve and rinse well. Cook with 1/2 cup water in a small saucepan and set aside. Drain and rinse the black beans, set aside.
Chop the mushrooms into pretty small pieces. Peel and roughly chop the carrots, then place in a food processor along with the greens, shallot, and fresh herbs. Process in short bursts until everything is small pieces but not so fine as to be mush. Saute the mushrooms in a skillet (preferably cast iron, of course!). This gives them a good meaty texture and flavor.
In a mixing bowl, mash the beans with a fork or potato masher. Mix all ingredients together, adjusting coconut flour (or bread crumbs) according to mixture wetness. Let sit for a while.
Heat up a griddle and oil well (no need to skimp--don't bother with Pam or something like that).
Scoop about 1/3 cup mixture, press firmly together in a ball, and flatten to about 1/2" thick. Place on griddle and let cook until nicely firm and toasty brown on bottom. This will take a little while, because you want the patty to cook through the middle while it's developing that toasty outer layer. Top surface should be somewhat dry before you flip. Cook nice 'n toasty on the other side.
Mom and I ate these with avocado, greens, and sliced tomato. She thought a nice yogurt sauce (such as raita) would really go well, and I'm definitely trying that next time!
Extra patties? You can cool, wrap in wax paper and ziplock bag or tupperware, and refrigerate or freeze for later.
I didn't think about photos as I was cooking, so I will try to remember next time I make them, which will be soon.
I'd love feedback! Let me know what you think, and if you try out this recipe.
Subscribe to:
Posts (Atom)