"Hi Honey, what kind of jam have you made lately?" My mom knows this is a sure-fire way to guarantee a couple of fresh jars coming her way next time I drive out for a visit. She's a good cook, makes all sorts of delicious dishes--but never jam. She spent too many summer days wrestling with flats of the discount produce my grandfather brought home, that had to be processed immediately or spoil by sundown. The steaming hot kitchen, sticky tabletop, boiling vats of water for sterilizing empty jars and processing filled ones. She catches sight of a metal screw top ring and shudders from the flashbacks.
Ahhh, I love the modern age. To be honest, besides jam my canning experience is limited to the spaghetti sauce I made from bushels of Roma tomatoes gleaned from the margins of a Del Monte field outside Sacramento one summer. It was a lot of fun, but unless I get my hands on that many free tomatoes again it's a one-off experience.
Jam, on the other hand. Anytime, any season--there's always going to be something I can whip up into a jar of happiness with very little time, effort, or mess. Not a single drop of sweat unless I decide to dance a little cumbia while the jam thickens.
Today's batch is my latest favorite, plum grapefruit. A combination born of intemperance--I'd eaten too many of the plums to have enough for a full batch, so I grabbed a couple of grapefruit and made up the difference. What I ended up with is lightly sweet and just enough tart, fragrant with plums and citrus zest and (in my latest version) intensified with a touch of cardamom.
First steps, plus a little information:
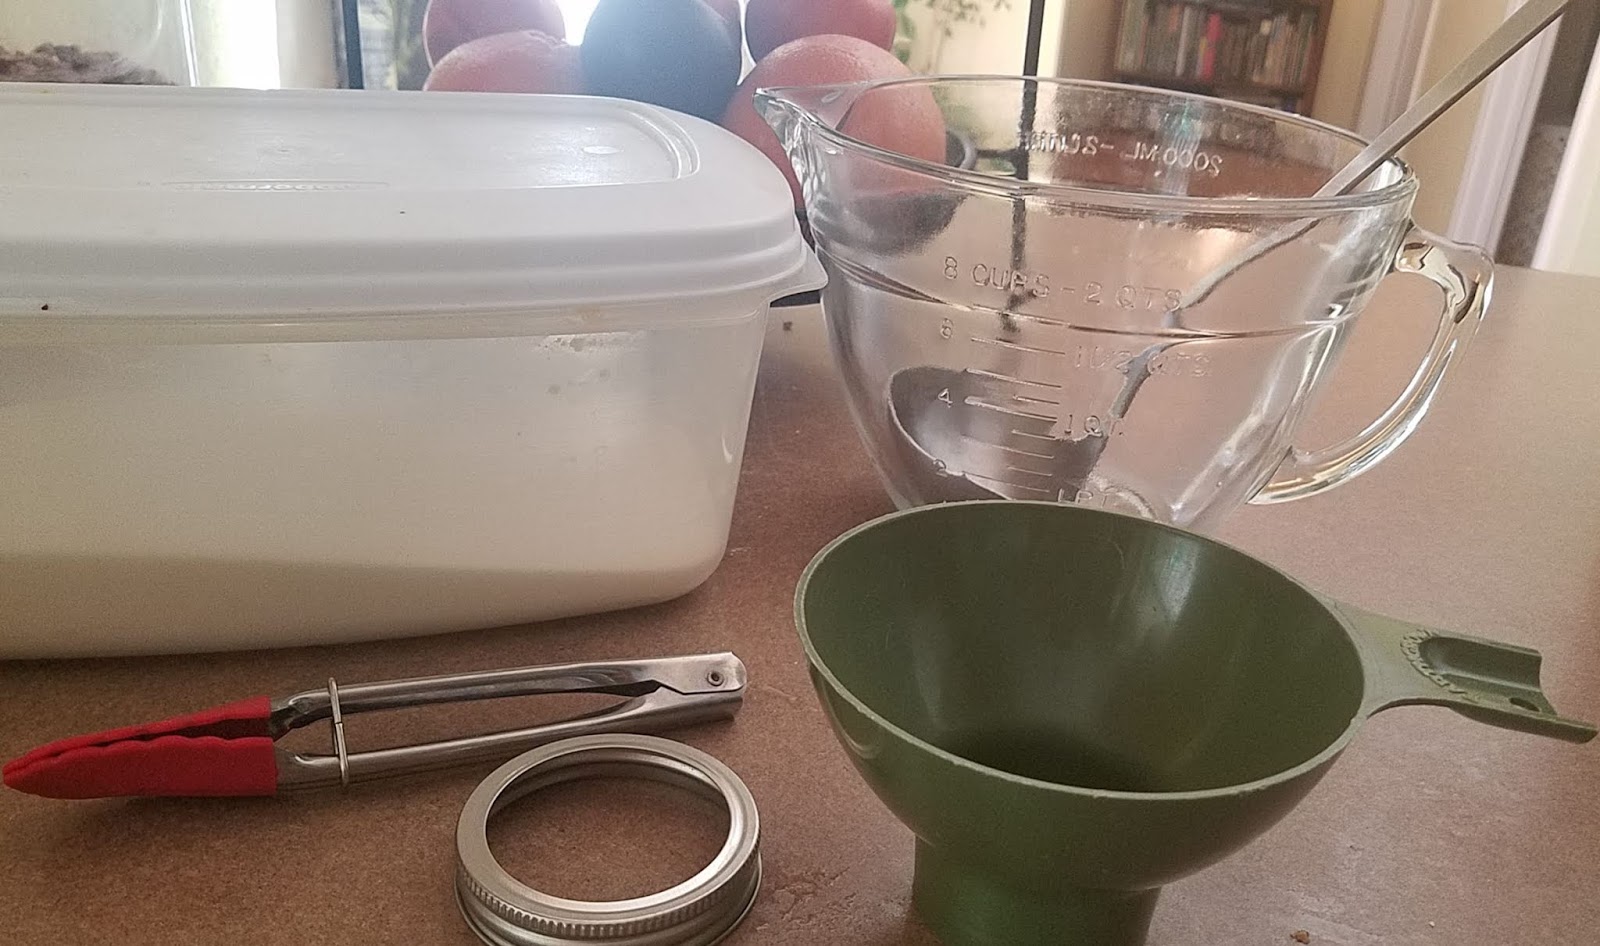
Sanitize nine 8-oz jars and screw rings. I simply add them to a load in the dishwasher and press the "hi-temp wash" button. Place nine new lids in a small saucepan, cover with water, and set on low heat. The lids must be new, or the jars won't seal properly. New jars come with screw rings and lids. If you're using old jars without screw rings, buy a box of new rings/lids. If you have rings, you can get a box of just lids. Target, Wal-Mart, and most supermarkets carry all these supplies, plus pectin, wide-mouth funnels, etc.
Also, you need a clear or translucent container. I use a large pyrex 8-cup measuring bowl. You can fill a glass bowl or plastic container with 6 1/2 cups of water, mark the line with a piece of scotch tape, and then go water your plants or use the water to boil spaghetti.
Set your sanitized jars next to the stove, ready to fill with jam. Turn the heat up under the saucepan containing the lids.
Plum Grapefruit Jam
6 generous-sized plums
2-3 grapefruit
4 1/2 cups sugar
1 box low-fruit pectin
1/4 tsp ground cardamom
Freshly ground black pepper
Cut the plums into large chunks, removing pits, and place in measuring bowl along with 1/2 cup water. Zest the grapefruit into the bowl, pare all the pith off the grapefruit, take out any seeds, and press chunks of grapefruit into the bowl until the juice fills up all the spaces between the plum chunks. Keep adding and pressing down grapefruit until the juice comes up to the 6 1/2 cup line.
Put the fruit mixture into a large pot over medium heat. Cook at medium-low for about 5 minutes. Puree with an immersion blender (if you don't have one, buy one because it will make your life easier so often you won't believe you survived without it OR puree the hot mixture in 2-3 batches in your regular blender).
Measure 4 1/2 cups sugar into a bowl. Remove 1/4 cup of that sugar and place in a small bowl, then mix in the box of powdered pectin, the cardamom, and a few turns of black pepper (these spices aren't required, but the fruit tastes SO MUCH MORE with them).
Add the sugar/pectin mixture into the fruit in the large saucepan and, stirring continually, bring to a rolling boil (one that doesn't stop bubbling no matter how much you stir) over high heat. Add the remaining sugar all at once, and bring again to a rolling boil. Boil for EXACTLY ONE MINUTE. Remove from heat. Turn heat off under saucepan containing lids.
Place the funnel in a jar and ladle hot jam into it, leaving 1/4" gap at top (I remove the funnel before I add that last little bit so I can eyeball the 1/4" gap). Wipe any drips off the rim, remove a lid from the saucepan using tongs, place on top of the jar, and screw a ring on. Pick up the jar with a towel to protect your fingers from the heat while you tighten the ring. Place the jar upside down on a towel spread out on the counter. Repeat this for the rest of the jam. Work quickly because you want the jam to be very hot as it goes into the jar, since its heat is what will seal the lid onto the rim and, as it cools, create a vacuum. Because it's just fruit and sugar, this lid-sealing/vacuum-creating process is all you need (unlike other forms of canning which require immersion processing).
Let the jars rest upside down for at least five minutes. Depending on your personality, this is a good time to:
A) Wash the bowl and pot and wipe down the counters
B) Relax with a cocktail because you just spent a whole half hour making jam!
Turn the jars right-side up, and as they continue to cool listen for that telltale "pop" as the cooling airspace inside creates a vacuum. You can also simply press the cooled lids with your finger--if they don't pop back at you, the vacuum seal is created. These jars of jam will keep at least six months on the shelf. If you still have any left (how could you? when every friend is going to want their own jar or two) pop it in the fridge, where it will keep for another year (in theory. No jam has ever gone uneaten that long).
Make yourself some jam and almond butter toast with the leavings you scraped out of the pot before you washed it. Mix yourself another cocktail.